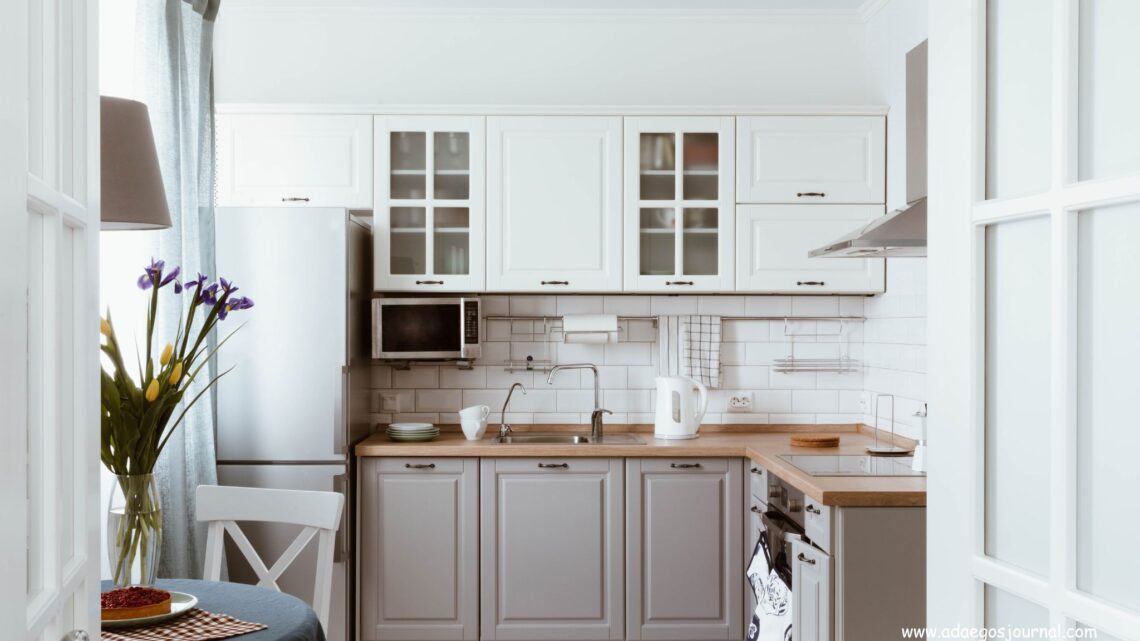
If you’ve ever opened your kitchen cabinet and something fell out at you… then you can totally relate to this post on how to organize a small kitchen.
I love a well-organized space. There’s just something about walking into a clean, tidy kitchen that instantly makes life feel easier.
Cramped and scattered spaces? Not so much. They literally make my skin crawl.
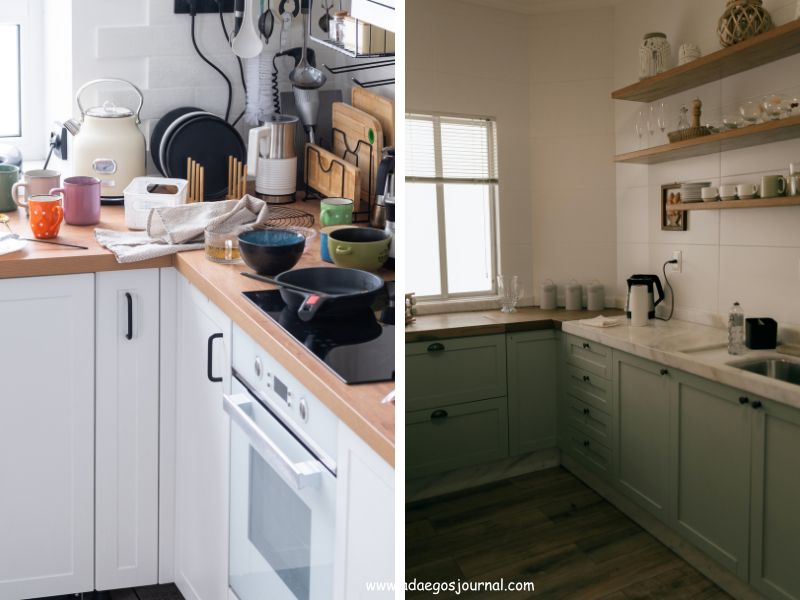
I’ve lived in my fair share of small kitchens. The kind where two people can’t stand side by side, where counter space is basically nonexistent, and where you somehow have three lids but no matching pots, and unneccesary take-out plastics.
When my husband and I first got married, we lived in a one-bedroom shared apartment. It was just the two of us, so it wasn’t terrible… but it was definitely cozy.
And by cozy, I mean…
Opening one cabinet would cause something to fall out.
The counter was always full, no matter how much I cleaned.
And somehow, every “organizer” I bought just made things worse.
I remember one evening, trying to cook a simple meal, and I had to move three things just to chop vegetables. That was my breaking point.
That’s when it clicked:
I didn’t need a bigger kitchen (or maybe i do eventually). I needed a smarter one.
If your kitchen feels too small, cluttered, or overwhelming, this guide will walk you through simple, realistic steps to turn it into a space that actually works for you.
Step 1: Declutter First (This Is Non-Negotiable)

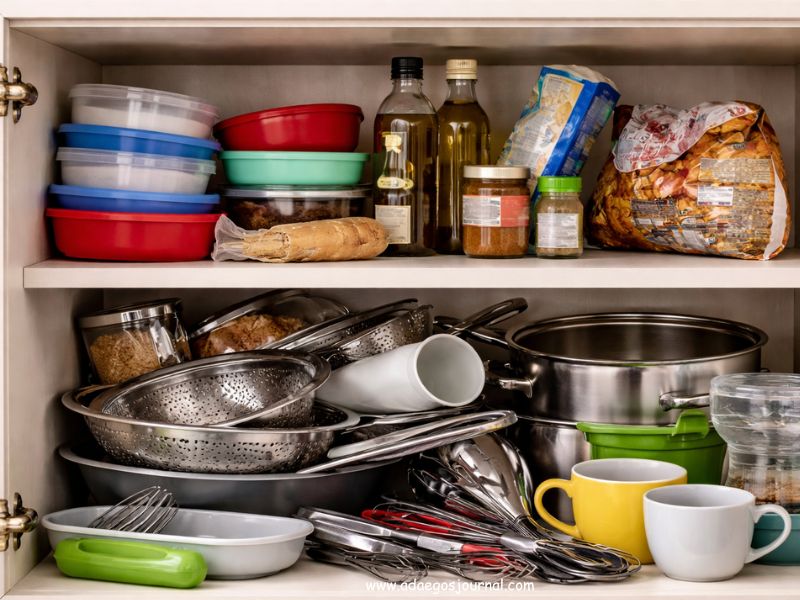
Before you organize anything, you need less stuff.
I used to think I needed better storage solutions… but the truth was, I just had too much.
Start with one cabinet at a time and ask yourself:
- When last did I use this?
- Do I have duplicates?
- Does this even belong in the kitchen?
Be honest. That chipped mug you’re “saving”? Let it go.
Quick rule: If you haven’t used it in 3–6 months,you probably do not need it, it’s just taking up space.
What to remove:
- Duplicate utensils
- Broken or mismatched containers
- Expired pantry items
- Appliances you never use
When I finally did this, I found things I forgot I even owned—and suddenly, I had space I didn’t know existed.
Step 2: Create Systems That Make Sense
Think of your kitchen like a mini grocery store—everything should have a logical place.
Create simple zones:
- Cooking zone: pots, pans, spatulas
- Prep zone: knives, cutting boards, mixing bowls
- Pantry zone: dry foods, spices
- Cleaning zone: dish soap, sponges
Then take it one step further:
Store items where you actually use them.
At one point, my spices were far from the stove, and I was walking back and forth every time I cooked. Once I moved them closer, everything felt easier instantly.
Even in a tiny kitchen, one cabinet can have mini-zones. The goal is simple: make your kitchen work with you, not against you.
Step 3: Make Your Space Work Harder
Small kitchens don’t lack space—they lack smart use of space.
The moment I stopped trying to “fit things in” and started using space intentionally, everything changed.
Here are simple upgrades that make a huge difference:
Use Vertical Space
Start thinking up, not out.
- Stack plates and bowls
- Store cutting boards upright
- Use vertical organizers for trays
Add Cabinet Risers
This instantly doubles your storage.
Instead of stacking everything in one tall pile, you create levels—no more digging through dishes just to find one plate.
Use Hooks (Inside and Outside Cabinets)
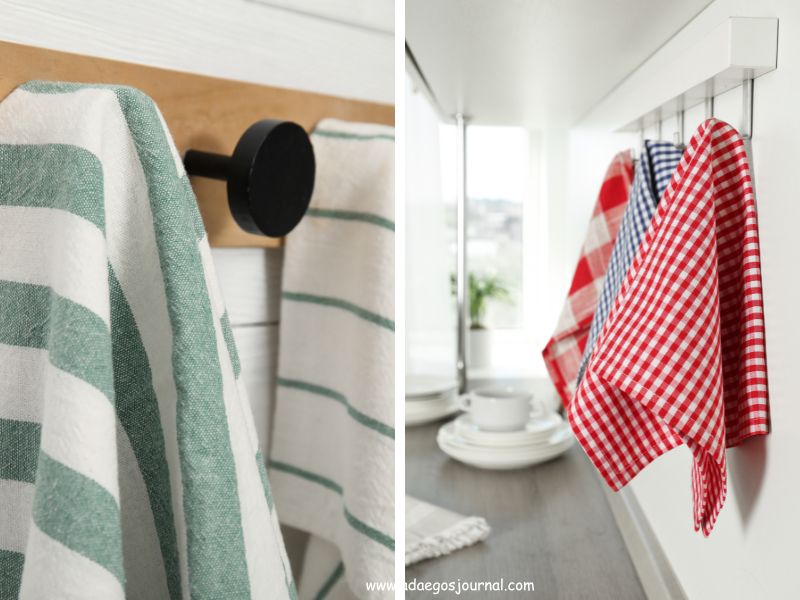
This is one of those “why didn’t I do this sooner?” changes.
Use hooks for:
- Measuring cups
- Spoons
- Pot lids
Even the back of cabinet doors can become storage.
Put Your Walls to Work
When cabinets run out, your walls step in.
Install:
- Hooks
- Rails
- Small wall racks
- Wall Mounted Storage
You can hang everyday items and free up serious space inside your cabinets.
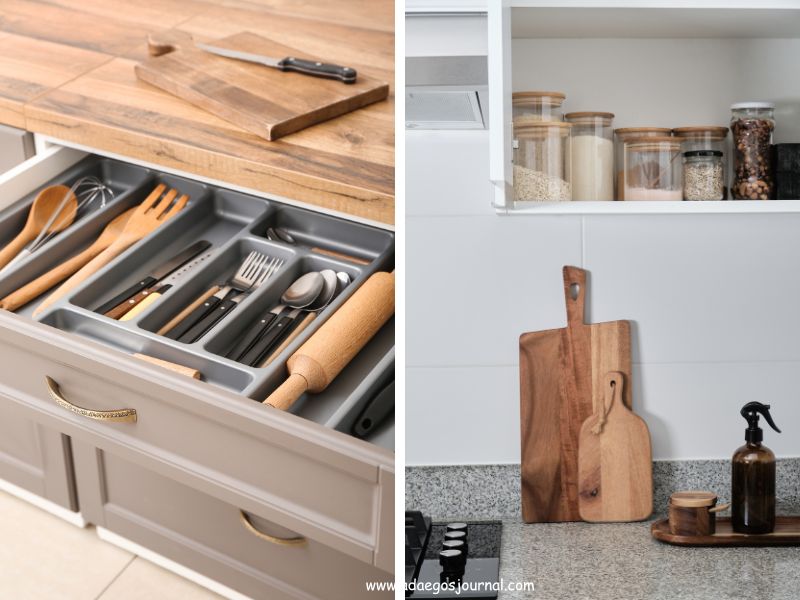
Use Drawer Dividers
Before this, my drawers were chaos.
Now everything has a place:
- Spoons in one section
- Forks in another
- Small tools neatly arranged
It’s a small change that makes daily life feel easier.
Step 4: No Pantry? Create One Anyway
If you don’t have a pantry, it can feel like you’re already at a disadvantage.
But here’s the truth: you don’t need a pantry—you just need a pantry system.
You can create one almost anywhere.
Use a Rolling Cart
This became our “extra cabinet.”
We used it for:
- Dry foods
- Fruits and vegetables
- Occasionally small appliances
And the best part? You can move it around when needed.
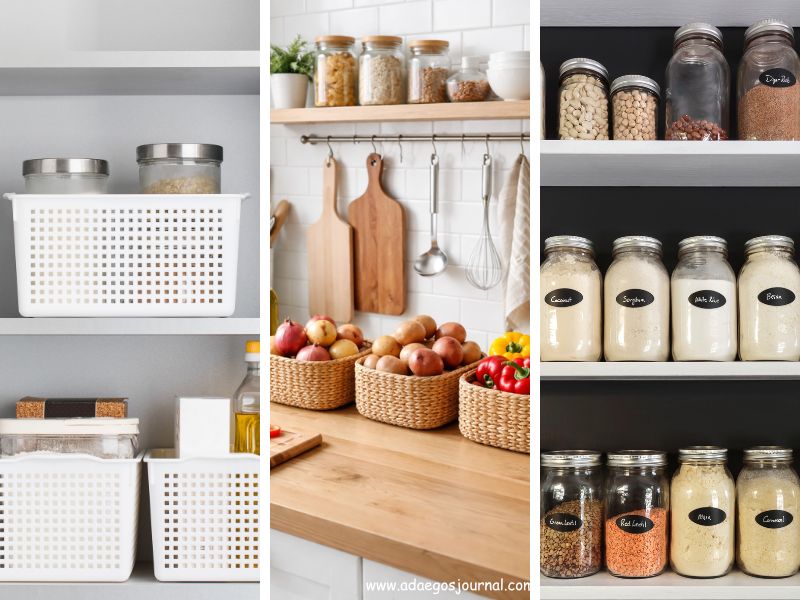
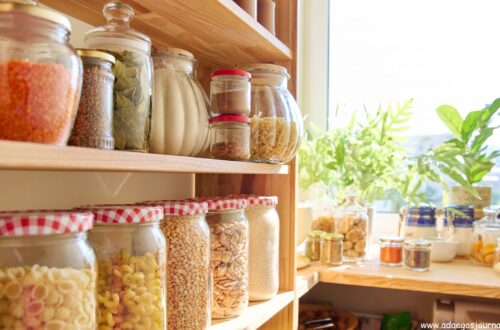
Turn a Cabinet into a Pantry Zone
Group all your dry foods together in one space.
Use:
- Clear containers
- Baskets
- Labels
This makes everything easy to see and access.
Use Baskets to Group Items
Instead of things being scattered everywhere, group them.
Use baskets for:
- Snacks
- Baking supplies
- Breakfast items
It keeps things tidy and easy to grab.
Think Vertical Again
Stackable containers are your best friend here.
They:
- Save space
- Look cleaner
- Help you avoid overbuying
Once I switched to clear containers, my kitchen instantly felt cleaner.
Step 5: Small Changes That Make a Big Difference
These are the little things that quietly transform your kitchen.
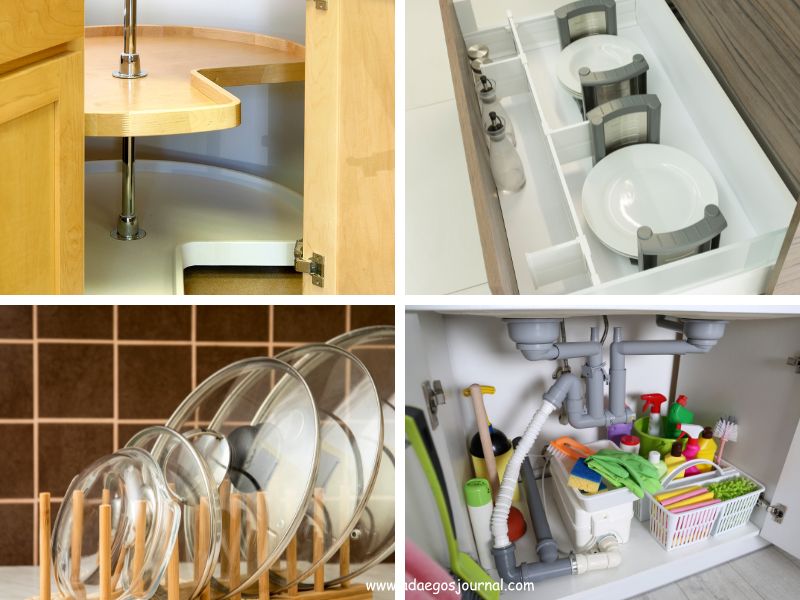
Use a Lazy Susan
Perfect for:
- Spices
- Oils
- Sauces
No more losing things at the back of cabinets.
Store Pot Lids Smarter
Pot lids used to be my biggest frustration.
Now I:
- Store them vertically
- Use a lid organizer
- Or hang them on hooks
Game changer.
Swap Your Knife Block
Knife blocks take up more space than you think.
A magnetic strip:
- Frees up counter space
- Keeps things accessible
- Looks cleaner
Organize Under the Sink
This space is often ignored—and messy.
Add:
- Small bins
- A simple shelf
- A rod for hanging spray bottles
Now it actually works instead of stressing you out.
Use the Top of Your Cabinets
That empty space above your cabinets?
Use it for:
- Bulk items
- Things you don’t use often
- Storage baskets
Just keep it neat so it doesn’t feel cluttered.
Step 6: Clear Your Counters (Instant Calm)
This one change alone can make your kitchen feel twice as big.
Keep only what you use daily:
- Kettle
- Toaster
- Maybe one decorative item
Everything else? Store it.
I used to leave everything out, and my kitchen always felt crowded. Once I cleared my counters, the space felt lighter—and cooking felt less stressful.
Simple rule: If you don’t use it at least 4–5 times a week, it doesn’t belong on your counter.
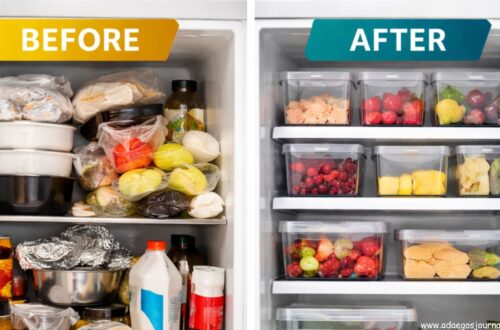
Step 7: Organize Your Fridge Too
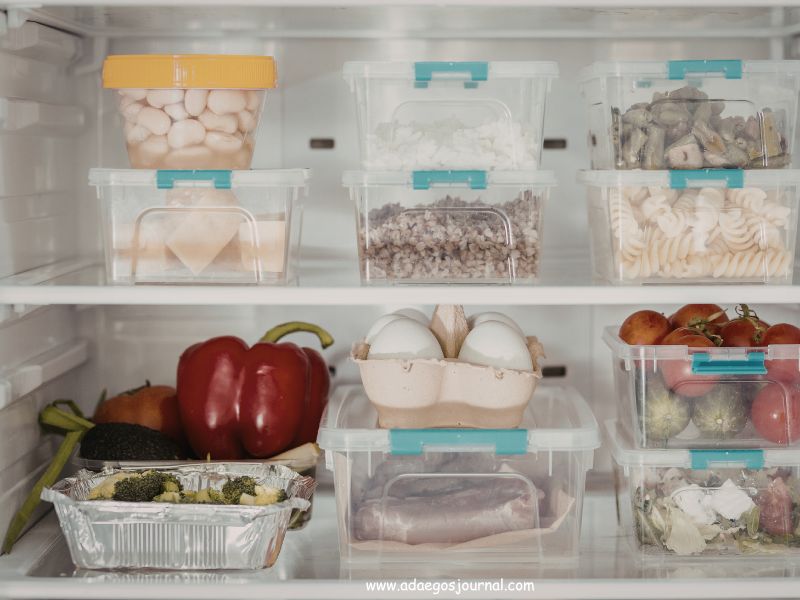
Your fridge is part of your kitchen system.
A simple structure works best:
- Top shelf: leftovers, ready-to-eat food
- Middle: dairy, drinks
- Bottom: raw ingredients
- Drawers: fruits and vegetables
Add small bins to group items, and suddenly everything is easier to find.
Step 8: Create a Drop Zone
Instead of things ending up everywhere, give them a home.
Simple ideas:
- A tray for keys and mail
- A basket for snacks
- A jar for frequently used utensils
This prevents clutter from building up again.
Step 9: The 5-Minute Daily Reset
This is the secret most people skip.
At the end of the day:
- Put things back in their zones
- Wipe your counters
- Wash and Reset dishes(Never leave dirty dishes in the sink overnight)
That’s it.
Five minutes.
Organization isn’t a one-time project—it’s a small daily habit.
Step 10: Make It Feel Like Home
A small kitchen doesn’t have to feel cramped. It can feel cozy.
Add simple touches:
- A small plant
- A clean, fresh scent (like citrus or vanilla)
- A nice towel or mat
When your space feels good, you naturally take better care of it.
Here’s What Matters Most
Living in a small kitchen can feel frustrating—I’ve been there.
Trying to cook in a cramped space, constantly moving things around, wondering if it will ever feel “put together.”
But here’s what I’ve learned overtime on how to organize a small kitchen:
It’s not about having more space.
It’s about using the space you have better.
You don’t have to do everything at once.
Start small:
- Declutter one cabinet today
- Create one zone tomorrow
- Clear one countertop
Those small changes add up faster than you think.
And before you know it, your kitchen won’t just look better—it will feel easier to live in.
And maybe—just maybe—you’ll start enjoying being in it again.
Thank you for Reading!!!
With Love
Adaego


One comment on “How to Organize a Small Kitchen”